 If
you have already set up a room rental order, you can view the order by
right-clicking on the room rental block from the Visual Scheduler screen
and selecting View Order.
If
you have already set up a room rental order, you can view the order by
right-clicking on the room rental block from the Visual Scheduler screen
and selecting View Order.
Room rental orders are room reservations explicitly connected to orders. Room rental orders are used to manage the sales of your rooms to outside customers, in the cases of meetings, conventions, and other group events.
If
you have already set up a room rental order, you can view the order by
right-clicking on the room rental block from the Visual Scheduler screen
and selecting View Order.
To create a room rental order:
1. From
the menu bar, select Facilities
> Visual Scheduler.
The Visual Scheduler search screen displays, as shown below.
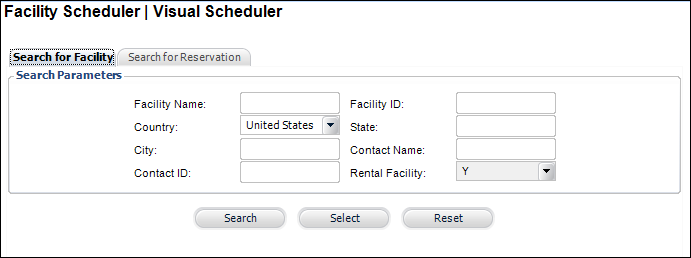
2. Search
for and select a facility.
The Facility - [Company Name] screen
displays.
3. Double-click
on a time period on the calendar.
The Facility Room Reservation Information screen displays, as shown below.
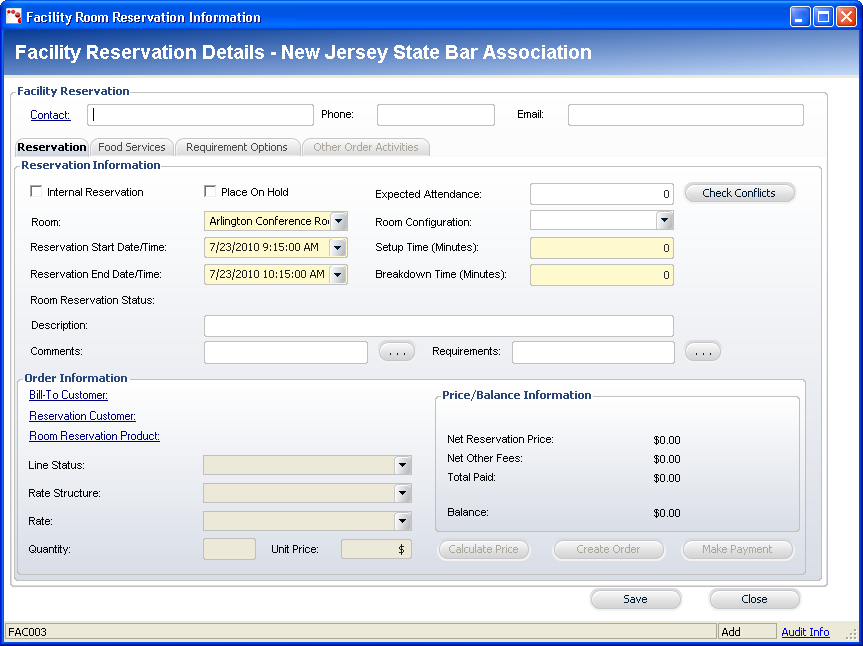
4. Select
the Room from the drop-down.
These are the rooms currently available for use within the facility you
selected in the previous search screen. The rooms available here can be
configured in Facility Maintenance.
5. Select
the Reservation Start Date/Time
from the drop-down.
The Reservation Start Date/Time is the specific time for which you want
to start the room reservation. Any changes made here will reflect back
on the Visual Scheduler screen.
6. Select
the Reservation End Date/Time
from the drop-down.
The Reservation End Date/Time is the specific time for which you want to
end the room reservation. Any changes made here will reflect back on the
Visual Scheduler screen.
7. If
necessary, enter in the Expected Attendance.
The Expected Attendance is the number of people you believe will be using
the room for the specified room reservation. This field is mainly used
for statistics information.
8. If
necessary, select the Room Configuration from
the drop-down.
The Room Configuration drop-down will list any available setups for the
selected room. Examples of this include “Conference Room”, “Classroom”,
“Roundtable”, etc. The Room Configuration generally refers to how tables,
chairs, and other equipment are setup within the room. You can manage
the available room configurations using Facility Maintenance.
9. Enter
in the Setup Time.
Setup time refers to the amount of time (in minutes) it will take an individual
to configure the room before it is used for the reservation. Some reservations
might require this if a lot of things need to be moved around before the
reservation begins. You can set this field to “0” if no setup time is
needed. Any additional time entered here will extend the reservation block
display on the Visual Scheduler screen.
10. Enter
in the Breakdown Time.
Breakdown time refers to the amount of time (in minutes) it will take an
individual to restore the room to its original state before it was used
for the reservation. You can set this field to “0” if no breakdown time
is needed. Any additional time entered here will extend the reservation
block display on the Visual Scheduler screen.
11. If
necessary, enter in a Description.
This is a basic description of the room reservation. This is commonly used
to include a general header or reservation title. For example, if the
room reservation is being used for an important divisional meeting, you
could specify “Monthly Divisional Meeting”. The description entered here
will display in the room reservation block on the Visual Scheduler screen.
12. If
necessary, enter in any Comments or
click the ... button to open the
Comments screen to enter additional comments.
This field is used to store any important notes or comments that may need
to be remembered or associated with this room reservation. For example,
if you are scheduling the room reservation for a yoga class, you could
add “also meets on Tuesdays and Thursdays”.
13. If
necessary, enter in any Requirements
or click the ... button to open
the Requirements screen to enter additional requirements.
Requirements specified here are generally used as “heads-up” notes or reminders
to include specific items with the room reservation, such as food or a
projector.
14. If
necessary, click Check Conflicts
to verify that the internal room reservation does not coincide with any
other scheduled meetings.
Clicking this will refer back to the Visual Scheduler screen (checks the
database) to make sure that there are no other room reservations or room
rentals scheduled alongside the room reservation you are currently entering.
15. From
the Order Information section, click the Bill-To
Customer link.
The Customer Chooser screen displays.
16. Search
for and select a customer.
The customer you select here will be automatically populated in the Reservation
Customer field. If you want to change the Reservation Customer, continue
with step 3.
17. Click
the Reservation Customer
link.
The Customer Chooser screen displays.
18. Search
for and select a customer.
The customer you select will be directly associated to this room reservation
or room rental order.
19. Click
the Room Reservation Product link.
The Product Chooser screen displays.
20. Search
for and select a product.
The products listed here are created using the Facility Product Maintenance
screen. Before you use the Visual Scheduler, various Facility
Products should have been created.
21. After entering in the above Order Information, you can Calculate Price of the order (this does not create an order) or Create Order.
a. Clicking on Calculate Price enables the Line Status, Rate Structure, Rate, Quantity fields. You can edit these and save them to change the order information.
b. If you want to immediately create an order without the extra step of calculating the price, click Create Order.
22. Click
Save.
The status changes to Pending Confirmation.
23. If
you have created an order and want to make a payment, click the Make Payment button.
This will prompt you to open a batch and then subsequently open the Quick
Pay screen.
24. Review the information and proceed with the order.
25. If the payment processes correctly, the room reservation status will change to “Confirmed”.
26. If necessary, you can add food services, requirement options, and perform other order activities.
If
the facility room rental includes tax, the tax will be calculated based
on the location of the facility (i.e., a room rental created in Virginia
will adhere to Virginia tax requirements).