 If
you have already assigned the room reservation you want to add food services
to, make sure to select the Food Service link from the left-hand side
task bar instead of selecting the Food Services tab to ensure that the
services are added.
If
you have already assigned the room reservation you want to add food services
to, make sure to select the Food Service link from the left-hand side
task bar instead of selecting the Food Services tab to ensure that the
services are added.
The Food Services tab of the Facility Reservation Details screen allows you to add specific food items or services to the order associated with the room rental. This tab provides a quick and simple interface to add services to your order.
If
you have already assigned the room reservation you want to add food services
to, make sure to select the Food Service link from the left-hand side
task bar instead of selecting the Food Services tab to ensure that the
services are added.
To add a food service to your room rental order:
1. Access
the Food Services tab on the Facility
Room Reservation Information, as shown below.
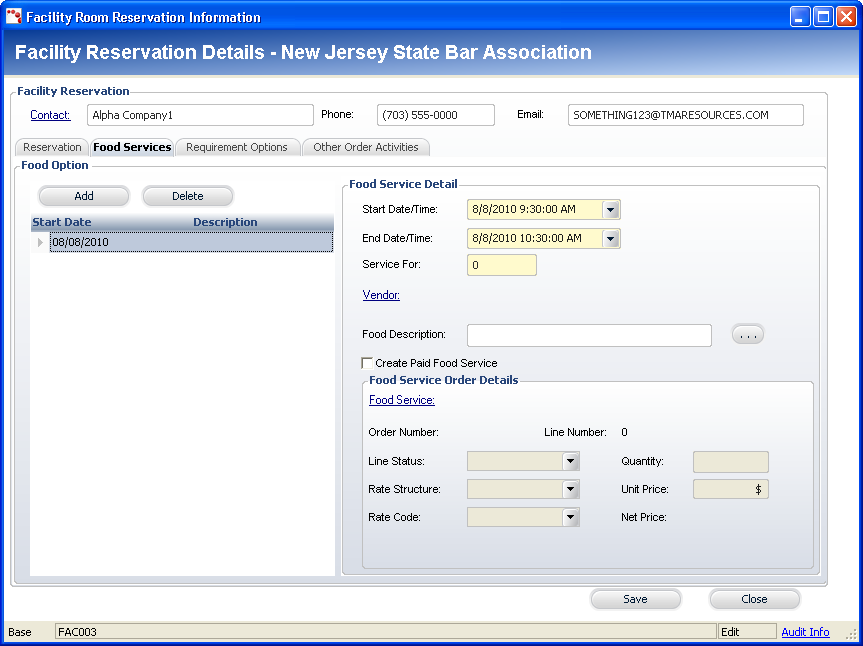
2. Click
Add.
A new line appears in the grid and the Food Service Detail fields are enabled.
3. Select the Start Date/Time from the drop-down.
4. Select the End Date/Time from the drop-down.
5. Enter in the number of people the service is for (Service For).
6. If
necessary, click the Vendor link
to open the Customer Chooser to search for and select a customer to associate
with this food service as the vendor.
This allows you to track who is responsible for providing the food service.
7. If
necessary, enter in the Food Description
or click the ...
button to open the screen to add additional information.
This is a short description of the food service you are associating with
this room reservation.
8. If
you want to link the food service to the room reservation order, check
the Create Paid Food Services checkbox.
This enables the fields in the Food Service Order Details section.
9. Click
the Food Service link to
open the Product Chooser to search for and select a product to use as
the food service.
The products available on this search screen can be configured through
Product Maintenance / Central.
10. Select
the Line Status from the drop-down.
Available options are Active, Cancelled, and Proforma.
11. Select
the Rate Structure from the
drop-down.
The rate structure determines if any discounts are applied based on your
organization’s membership structure. For Food Services, this will typically
be either Member or Non-member.
12. Select
the Rate Code from the drop-down.
The rate code is used to determine if pricing needs to be changed based
on time limits or the amount of people using the Requirement Option. Rate
Codes for Food Services are usually based on the quantity of people consuming
the food.
13. Enter
in the Quantity.
This is the number of food service products you want to associate with
the room rental order.
14. Enter
in the Unit Price.
This usually automatically populates from the stored information in the
selected food service product. If not, you will have to enter a price
manually. The Net Price will
automatically calculate based on.
15. Click Save.
At
any point, you can click the More Information button
to open up the Line Item Details screen for the food service product you
have selected. This screen allows you to review the order with a greater
level of detail.