
The Email web module is used in e-Business to allow users to send emails to customers or members in the database. This module is typically only used with Affiliate Management.
To configure the Email web module:
1. Log into your site as Host.
2. Navigate to the appropriate page on your site where you want to add the Email web module.
3. From the Host toolbar, select the “Personify-Email” option from the Module drop-down.
4. Click Add Module To Page.
5. Move the web module to the appropriate place on the page, as shown below.
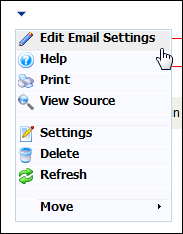
6. From the web module menu, click Edit Email Settings.
7. The following page displays:
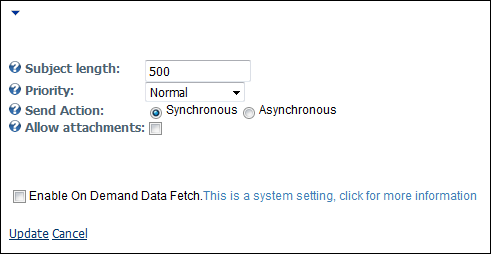
8. Configure the appropriate module settings as described below:
· Subject Length - Text box. This setting allows you to set the maximum number of characters allowed for the subject header.
· Priority - Drop-down. This setting allows you to set the importance of the importance of the outgoing email.
· Send Action - Radio button. This setting allows you to determine whether or not to use a synchronous or asynchronous connection when sending an email.
· Allow Attachments - Checkbox. When checked, this setting allows customers to add attachments to their emails
9. Click Update.
After setting up the Email module, it may appear, as below, to your customer.
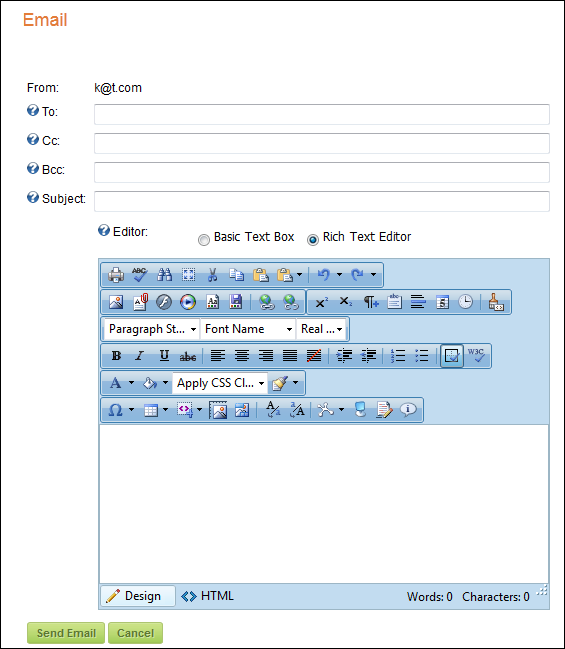
The customer’s email address defaults as the “From” address and the customer has the option of using the Rich Text Editor or a Basic Text Box.