Configuring the DNN Schedule Web Module
The DNN Schedule web module does not need to be dropped onto any page on your site and requires no setup. It simply needs to be installed on your site. It is the library needed to enable the Personify Scheduler items.
 TMA Resources recommends configuring the time lapse schedule of the DNN Schedule Web Module Event Log to one day. The proceeding steps detail how to do so.
While these instructions concentrate on the lapse schedule, you can also find information on how to configure other DNN Schedule settings within these steps.
DNN version 5.4 is the supported version for Personify 7.4.0
To configure the DNN Schedule web module:
1. Make sure you are logged into the website as a Host.
2. From the menu bar, select Schedule from the Host menu.

The DNN Schedule web module displays as shown below.
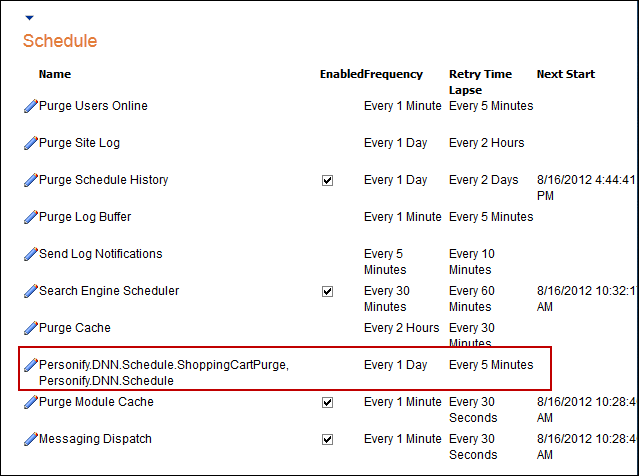
3. Click the pencil icon next to “DotNetNuke.Services.Log.EventLog.PurgeLogBuffer, DOTNETNUKE” (as shown in the image above) to open the specific job type in edit mode.
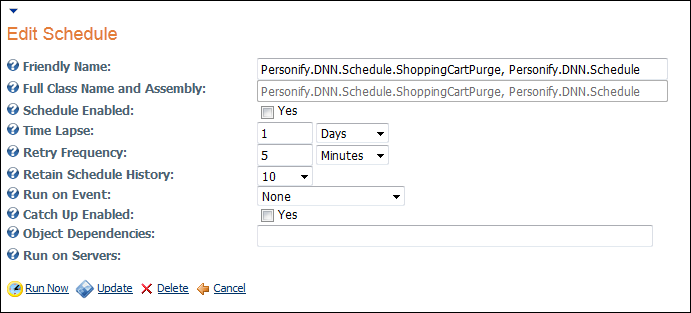
The Edit Schedule Job Type screen displays as shown below.
If you would like to configure a different job type of the DNN Schedule, simply click the pencil icon next to the desired job you want to edit settings for.
4. From the Time Lapse drop-down, select 1 Day.
Setting the Time Lapse to 1 Day is only a recommendation of TMA Resources. You may configure your settings in a way that best suits your association or discuss the best settings with your Account Specialist.
5. Click Update.