 The
portals listed on the Personify - Site Setting screen are created using
the Portals module. For more information on creating portals, see “Working
with Portals”.
The
portals listed on the Personify - Site Setting screen are created using
the Portals module. For more information on creating portals, see “Working
with Portals”.
The
portals listed on the Personify - Site Setting screen are created using
the Portals module. For more information on creating portals, see “Working
with Portals”.
To configure the Portal Settings:
1. In
the page containing your Personify - Site Settings module, there is a
table at the bottom of the web module with your Portal IDs. Click the
pencil icon in the table.
The Personify Portal Settings display as shown below.
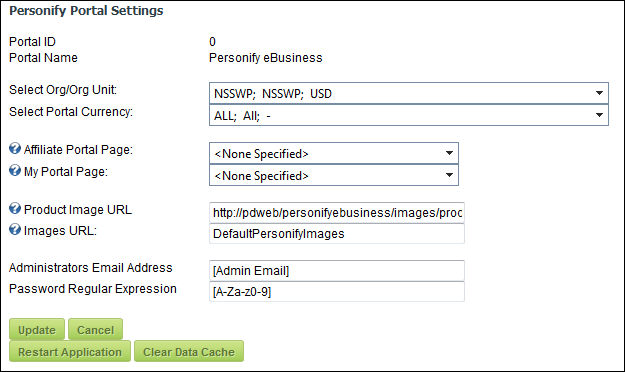
2. In the Personify Portal Settings section enter the appropriate information:
a. Select Org/Org Unit (allows you to select the Org/Org Unit to which this portal belongs and displays the Org/Org Unit’s base currency)
b. Portal
Currency – If using multiple currencies across multiple portals, you must
select the currency that this portal will use.
If using multiple currencies across a single portal, you must select ALL.
c. Affiliate Portal Page
d. My Portal Page
e. Product Image URL
f. Images URL
g. Administrator’s Email Address
h. Password Regular Expression
Portal
ID and Portal Name are inherited from your Portal setups.
3. Click Update.