Uploading DCD Files
The DCD Download Files task is where you actually upload the product
you are selling. This screen allows you to upload the DCD product, create
a description of the product, create copyright information, etc.
 Since
Personify allows you to add more than one file per DCD product, on your
e-Business website the “Add to Cart” button will not be available from
the Product Listing. Your customers must view the DCD product’s Product
Detail screen and select which files they want to download before adding
the product to their shopping cart.
Since
Personify allows you to add more than one file per DCD product, on your
e-Business website the “Add to Cart” button will not be available from
the Product Listing. Your customers must view the DCD product’s Product
Detail screen and select which files they want to download before adding
the product to their shopping cart.
To upload digital content:
1. From
the Subsystem Specific task category, click
DCD Download Files.
The Digital Content screen displays, as shown below.
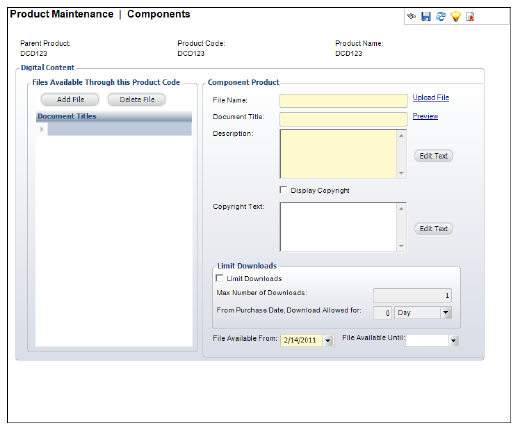
2. In
the Files Available Through this Product Code section, click Add
File.
A new line is added to the grid and the Component Product section becomes
active.
3. Click
the Upload File link.
The Open window displays. Search for and open the digital file you want
to add as part of the product.
4. Enter
the Document Title in the text
box.
5. Click
Edit Text above the Description
text box.
The HTML Editor Dialog window opens. Enter a description of this digital
file and click OK.
6. If
you want copyright information to display along with the DCD product,
check the Display Copyright checkbox.
7. Click
Edit Text above the Copyright
Text text box.
The HTML Editor Dialog window opens. Enter your copyright information and
click OK.
8. If
you want to limit the amount of times a customer can download this file,
check the Limit Downloads checkbox.
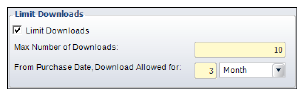
a. Enter
the Max. number of Downloads.
b. In
the From Purchase Date, Download Allowed
For box, enter a number for the time you want the product to be
available for download after being purchased.
9. Select
the File Available From date
for this file.
10. If
necessary, enter the File Available Until
date for this file.
11. Click
Save
12. View
the file that you have uploaded by clicking the Preview
link.
| Screen Element |
Description |
Files Available Through
this Product Code |
| Add File |
Button. When clicked, a new row is added to the grid and the
Component Product fields become active. |
| Delete File |
Button. When clicked, the highlighted row is removed from the
grid and any information in the Component Product fields is lost. |
Component Product |
| File Name |
Text box. The name of the file being uploaded. |
| Upload File |
Link. When clicked, the Open window displays and you can find
the file on your system that you want to upload. |
| Document Title |
Text box. Allows you to create a friendly name for the file
being uploaded. |
| Preview |
Link. Allows you to preview the product you are creating. You
can only preview the product after uploading the file and creating
a Document Title. |
| Description |
Text box. Displays the description you created for the file. |
| Edit Text |
Button. When clicked the HTML Editor Dialog window displays
and allows you to enter either the product’s description or copyright
information. |
| Display Copyright |
Checkbox. When checked, any copyright information you add to
the product will display on the Web. |
| Copyright Text |
Text box. Displays the copyright information you added to the
file. |
Limit Downloads |
| Limit Downloads |
Checkbox. When checked, a customer can only download the DCD
product a specified amount of times and/or within a specified
time limit. |
| Max. Number of Downloads |
Text box. Allows you to set the number of times the DCD product
can be downloaded by a customer. |
| From Purchase Date, Download Allowed For |
Text box. Displays the number of days or months after the order
date that the product is available for download. |
| Drop-down. Allows you to choose whether the amount entered
in the “From Purchase Date, Download Allowed For” text box is
for Days or Months. |
| File Available From |
Drop-down. The date from which this file is available to purchase. |
| File Available Until |
Drop-down. The date this file is no longer available for purchase. |
|